I’m baaaack, with baby knits

Hello blog! Wow, it’s been awhile. Since my last post, I had a baby and moved across the country. Interestingly, I had no desire to knit/sew/craft while I was pregnant. I guess I’m catching up on that now and present to you two baby sweaters.

The first is a cardigan based on this pattern. I basically followed the pattern exactly, and the only modification I made was to add a line of knitting down the fronts of the cardigan when I was done with the collar to help mitigate any rolling. I normally don’t like top-down knits because my decreases are much neater than my increases, but this one knitted up really nicely. View this project on Ravelry.

The second is a sweater based on this pattern, though it’s obviously very heavily modified. I incorporated the thermal pattern from Thermal by Laura Chau. I reversed the row pattern as such: K one round, P one round, K2 P2 two rounds. This way I don’t have those obvious color change purl bumps. This was knit entirely out of stash yarn, and I ran out of the brown yarn on the collar so simply met the collar in the middle instead of overlapping the front. I also added German short rows to the collar, which I think helps it lay nicely. The last thing I changed was I only picked up 38 stitches around the arms instead of the 46 stitches specified in the pattern. I’m not sure how you could possibly pick up 46 stitches – there’s simply no room or my gauge ended up really different from the original pattern. In any case, I decreased every 8 rows and ended up with 32 stitches for the arms as the pattern specifies.  View this project on Ravelry.

I’ll try to craft and post more regularly but I have a baby, so no promises!

Jersey Maxi Dress

IMG_0590

With the arrival of Spring, I’m feeling much more inspired to sew, though it did snow about 2 inches this morning.

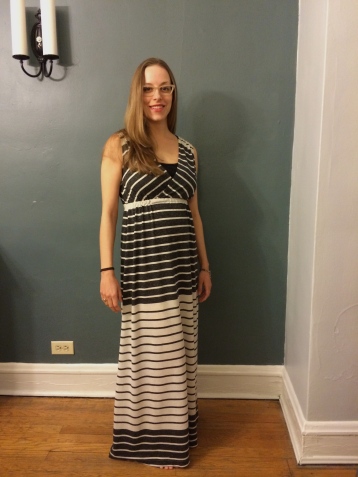
This is pattern M6700 and I used a jersey fabric.  I ordered the fabric from Fabric.com, and didn’t realize how large the pattern repeat was, and once I got the pattern on the fabric, I decided to “color block” the dress.

Jersey Dress - Back

However, I didn’t have quite enough fabric to do this, so it required me to halve the back skirt section into two panels and sew the back together.  Not a huge deal, but lining up the stripes proved more difficult than I anticipated.  I’m actually really proud of my stripe-matching-skills (above).  It did give me good practice for matching the side seams.

I cut and sewed the ties at the shoulder, but when it came to putting them on the dress, they just didn’t make a lot of sense to me so I left them off.  The shoulders don’t slip, so it’s not a necessary design element.

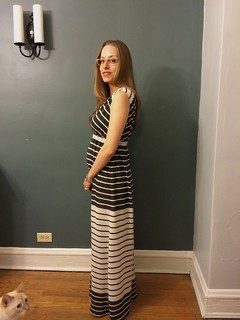
The only modification I made was to bring the waist band up to create a higher empire waist as the pattern waist falls about near the natural waist.  I also cut a larger pattern size to allow for outward expansion…

Jersey Dress - Side

(please excuse the cat photobomb)

That reminds me – I’m 4 months pregnant!  For the near future, I’ll be trying to sew maternity-appropriate clothing.  Mostly I’m just altering my current patterns and sewing A-line, empire patterns, but eventually that won’t be enough.  So if you have maternity pattern suggestions, please let me know.

Chiffon Dress

IMG_0458

IMG_0462

Back

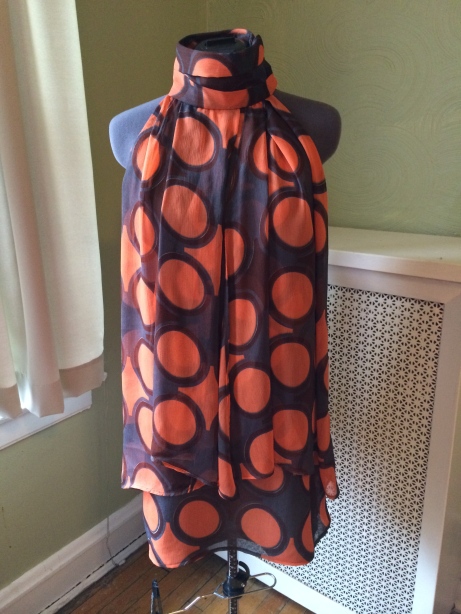
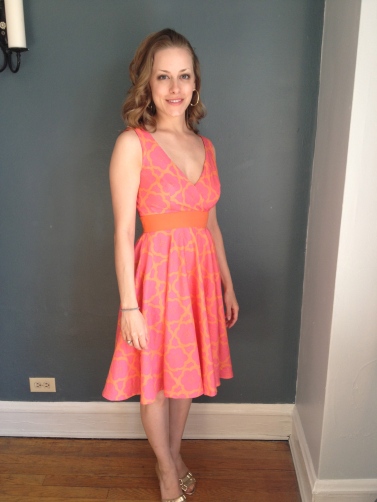
Like my last post, this is also a very tardy post.  I bought this fabric probably this past summer sometime for V1240.  I was nervous about working with chiffon after my adventures with the polka dot shirt, but I wanted a challenge.  I read several articles and blogs about soaking the fabric in gelatin or spraying it with starch to stabilize the fabric to make it easier to work with.  For months, I thought about this project and how to best manipulate the fabric, knowing I should make a muslin, etc.  Finally, I realized I was never going to do those things, so I just took a shot at it.

IMG_0467

Dress form(s)

First, a quick shout out to my mother in law who got my this incredible dress form for Christmas!  I guess I’ll have to retire my duct tape form.

IMG_0459

Neck band

The reviews on sewing.patternreview.com consistently referenced the arm holes being REALLY low, and they weren’t kidding.  When I got to the point of attaching the neck band, the arm holds were halfway down my ribs and the front panel was so angled that it caused major side-boob.  My fix was to just take about 2 inches off the front and back panels at the neck and then reattach the  band.  However, now the neck band attached very differently to the two panels and none of the symbols matched up anymore.  I finally got it to work through trial and error, but I think it took me three tries to attach the band, which started to destroy the fabric.

IMG_0463

Zipper

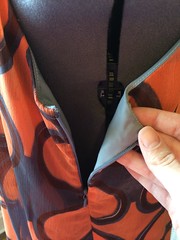
I  have to say how proud I am of this hidden zipper.  It only took my one try, it lined up perfectly, and I still don’t have an invisible zipper foot!  I was incredibly surprised it worked the first time.

The only other change to the pattern I made was to use French seams.  It seemed prudent considering the chiffon frayed by just looking at it.

IMG_0063

Ta-da

This is by far my favorite project.  I wore the dress for a Thanksgiving party, and then a Christmas party (I told you this was a tardy post).

A Very Late Christmas Post

IMG_0260

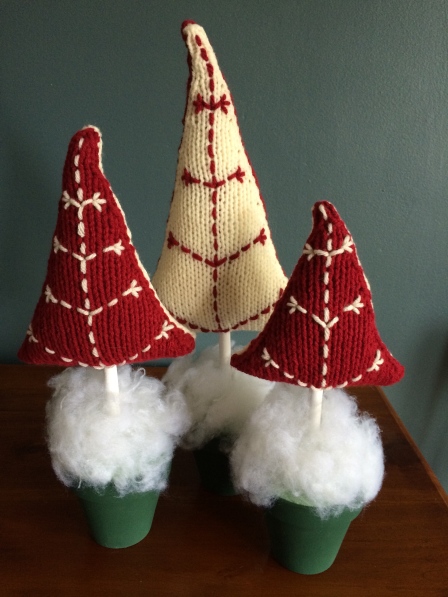
By “very late christmas post” I mean very late.  I made these Christmas tree decorations LAST Christmas and never got around to posting them.  Then Christmas came and went, and I never took a photo for the blog, and then the decorations went in a box, and the box went in the storage unit.  I got the decorations out again this year, but the holidays are so crazy that I still didn’t get around to taking a photo of them until just now.

Better late than never, no?

The trees are pretty simple to make – I just followed the directions as written.  I didn’t add buttons, obviously, but I still like the way they look.  What was unexpected was how long the project took.  It’s kind of like socks – you finish one and you have to start all over again.  Only this time I had to start over three times.

Sorbetto Redux

Front 2

(Apologies in advance for the poor quality photos.  I was my own photog today.)

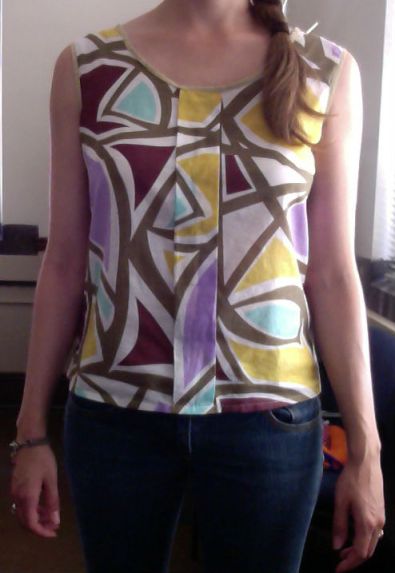
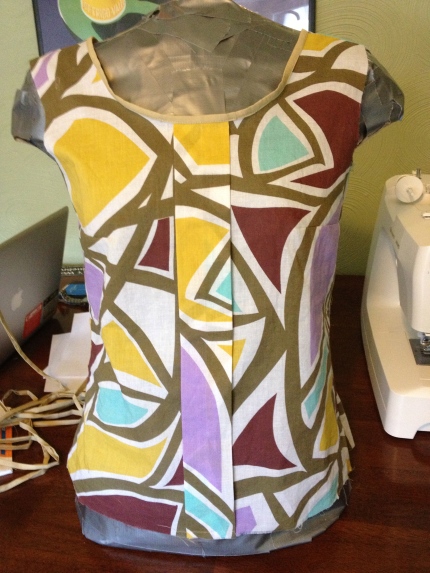
Presenting a more-or-less fixed Sorbetto.  First, many thanks to Terri and MaryKS for their comments on my last post.

Bias Tape Detail

Bias Tape Detail

To summarize my fix:

  • After removing the bias tape, I stay stitched the neck.  This was easier to do this time around for two reasons.  First, I had already attached the front and back at the shoulders so there was no “end” to the fabric, which I think helped prevent my machine from “eating” it.  Secondly, I used a regular zipper foot of all things to do the stay stitch, which helped keep the fabric flat and prevented my machine from “eating” it (again, I think).
  • Next, I sewed on the bias tape, pulling it pretty taut in the process.  I think this was my biggest mistake from the previous attempt.  I definitely  had too much bias tape; I ended up cutting 1/2″-3/4″ off the end.  I actually re-sewed the bias tape twice as I attached the wrong side the first time…it’s like I was trying to mangle my fabric.
  • Once I had the neck done, the arms were not so bad.  I used the same method and pulled the bias tape to prevent gapping.

It’s not perfect, but it’s a lot better than before. I think the next time I need to use bias tape, I’m just going to buy some.  I’m not convinced it was worth all the trouble to make my own.

Cross Front

Front View

Back

Back View

A Sorbetto Problem: Please Help!

IMG_1250

*Sigh*  I have a problem and need advice.  Presenting Sorbetto (free pattern!), approximately 75% complete. The fabric was on the discount table at the fabric store, so I don’t know much about it’s contents other than it’s a cotton blend of some sort.  It has a slight stretch on the bias.

But first a photo of my ever faithful sewing assistants…

IMG_1243

Clearly they are a big help…

Moving on.  I made my own 1/2″ bias tape using the tutorial by Coletterie.  I was really excited about making my own tape and ordered bias tape makers.  “It’s so easy” they said, “it’s fun” they said.

IMG_1246

I read and re-read the tutorial and thought I completely understood the process.  Turns out, I didn’t.  I was completely confused and even asked the scientist husband to help.  He was also confounded despite his superior spatial orientation skills.  Finally, we both stared at the fabric long enough (which I had cut into a parallelogram and marked lines at this point) and  figured out how to align everything into a spiral tube of sorts.

I then cut out the tape, but somehow my measured lines didn’t line up – some were wider than others.  Huh?  I seriously spent a long time measuring and I still had uneven widths?  I give up.

Then I ran the bias tape through the bias tape marker with my iron.  Not as easy as I was led to believe.  It took forever to press the bias tape, but I did end up with A LOT of bias tape.

IMG_1247

Alright, so now I was ready to attach the bias tape around the neck, which I did according to the directions in the pattern.  As here’s my problem: serious gaping.  It’s clear the neck got stretched out when I was attaching the bias tape.

But how can I fix it?

One step I skipped in the pattern directions was to stay stitch around the neck on both the front and back.  I know, this is obviously the issue.  BUT, because the bias tape is 1/4″ wide after folding, I would have had to stay stitch at 1/8″ in the seam allowance.  I did try doing this, but my machine kept “eating” the fabric with such a small allowance and almost destroying the fabric.  I finally had to give up and move on with the pattern.

But clearly this gapping is not acceptable.

My thought now is to re-make the bias tape (I’ll have to use the main fabric, of which I have plenty left over, because I don’t have any more contrast fabric).  This time, though, I’ll make  1″ tape so that I have a wider seam allowance to play with and would (hopefully) be able to successfully stay stitch the neck.

Any other suggestions?

Polka Dot Skirt

IMG_1236

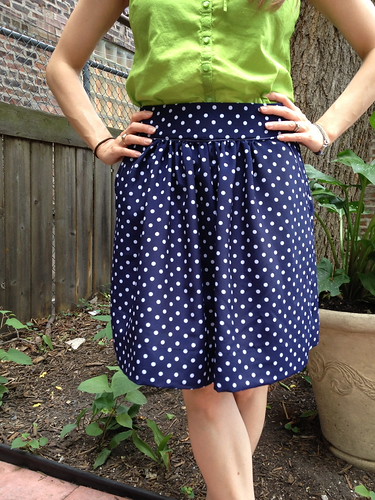
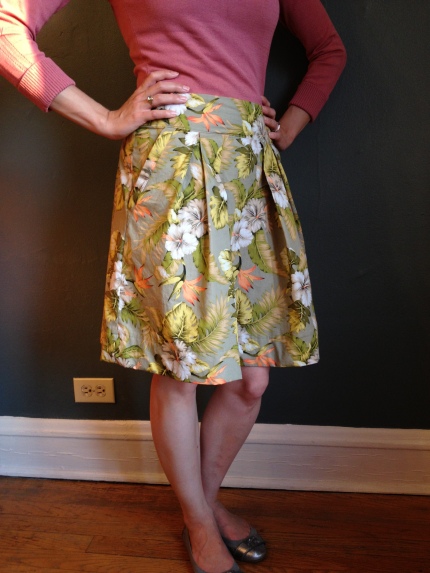
Wow, I’m already posting another project!  I was so impressed with the last skirt I made that I had to make another.  I used the same pattern (M5591), and the husband picked out the fabric, again.  Now, close readers of my blog may remember the last time I used polka dots…it wasn’t a good experience.  In fact, it kind of turned me away from polka dots.  I know…I know…  This polka dot project ended better, but the fabric is a slippery-ish polyester that proved a little hard to work with.  I was complaining to the husband about the fabric he selected slipping all over the place and his response was, “good…experience…”  Like I’m building character or something.

Anyway, I made some relatively significant modifications to make this skirt something other than a carbon copy of the floral skirt:

  • I moved the zipper from the back seam to the side seam.  This meant that I cut both the front and back skirt panels on the fold of the fabric (taking into account the extra 5/8″ seam allowance on the back skirt panel that wasn’t necessary).

IMG_1240

  • I also cut both the front and back waist band sections on the fold, again removing 5/8″ from the back band section since I wouldn’t be needing it.

IMG_1239

  • In place of the pleats, I gathered the front and back sections using ease stitching (a good tutorial here).  I kept the fabric near the side seams and pockets flat so that it would be easy to sew and so that the pockets would lay smooth.

IMG_1241

  • I actually inserted the zipper per directions this time, which, lo and behold, was easier than winging like I did last time.  The zipper is still a little messed up, but I only had to sew it in once.

IMG_1242

  • I edged stitched along the pocket and waistband in contrast (white) thread

And viola, a new skirt.

IMG_1238

A Skirt and a New Machine

photo copy 3

I know it’s been awhile, and for good reason.  The really awesome sewing machine my mother-in-law gave me broke.  Apparently, the bobbin gear is plastic and stripped, which is a common issue for the model.  I was super bummed and was going to have to take it to a Singer store, which was no where near my neighborhood.  Long story short, my really wonderful husband bought me a new machine (with metal gears)!  It’s a Husqvarna and is really great so far.

photo copy 2

Front View

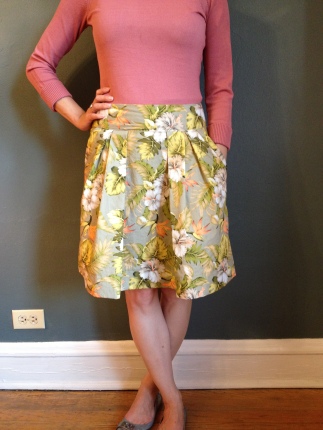
I was really excited to sew again, so I picked up some fabric (actually, the husband picked the fabric) and I whipped up this skirt on Sunday.  The pattern is M5591.  This is view A, but I left off the bottom band, lengthened the front and back panels to make up for not having the band, and then ended up generously hemming to get the right length.  There’s only 8 pattern pieces, and it’s a pretty quick sew.  It took my probably a lot longer to sew the skirt than necessary, but in my defense I was getting used to a new machine.

photo

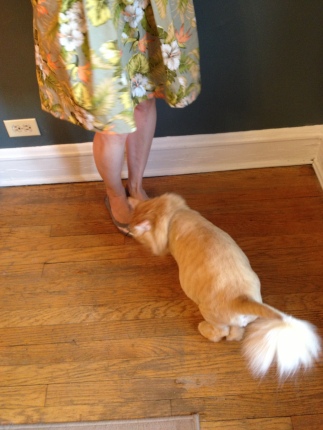
My Sewing Assistant

I was really impressed by the fit of this pattern, so I’m already thinking of ways to alter this and make it again.  The original pattern has pleats and a back zipper, and I’m thinking about altering it to a gather skirt with a side zipper.  Stay tuned!

Spring was here for one day, so I wore this dress I made

IMG_0977

Yesterday was 70 degrees!  Today it’s 40 degrees.  Ugh.  But at least I was able to wear this dress yesterday to the theater.

I’ve been working on this dress since right after I finished the plaid button down.  The pattern is M6557, and is really pretty simple with only a few pieces and really not that much sewing.  The top is lined, and the back is cut-out (my favorite part of this dress).  Because the button down was such a challenge, I thought this would be a quick and easy project to building the confidence back up.

IMG_0975

But here’s the thing.  The bust darts were more than a little outrageous.  I’ve had this problem on the last few McCall’s patterns I’ve used.  Is it just me, or does McCall’s think my breasts are at my shoulders?  And not only are the bust darts REALLY high, but they’re extreme in width, too.  Unfortunately, this left me with the pointiest darn bust darts, a la Anne Hathaway.

I shortened and reworked the darts, and sewed and re-sewed, and pressed the crap out of the bust, and I was still left with pointy bust darts.  Luckily, my professional-designer-aunt-in-law visited and told me to just take out a seam of the lining and extend the dart with the slightest curve at the end.  So I did.

The bust darts are still a little wonky, but it’s wearable now.  Anyone else have issues with the newer McCall’s patterns bust darts lately?

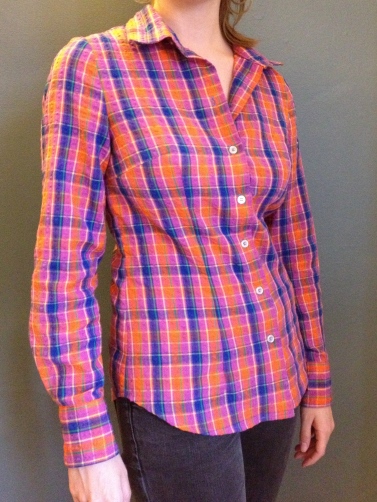
Sorry it’s been so long, but here’s a shirt I made

IMG_0917

Apologies to the (probably only three) people who read my blog!  I know it’s been a long time since I last posted, but life gets in the way of crafting, knitting, sewing, etc.  My creativity has not actually been suppressed by stress or work or what not.  I’ve finished a few projects over my silent period but never got around to posting.  In any case, here’s a shirt I made!

My awesome mother-in-law  “traded” sewing machines with me, so now I have a sewing machine with a button-hole foot (along with several other features)!!  OMG.  I cannot believe I was doing button holes by hand.  My next project requires an invisible zipper, so I will test out the zipper foot next (also a foot I didn’t have with my previous machine).

Back to the project at hand.  The pattern is V8772, and you might remember this from a previous project and post.  I wasn’t particularly happy with the results of the polka dot shirt, so I decided to try again.  I cut out a size 6, because the size 8 in the polka dot shirt was pretty roomy.  I spent a long, long time carefully laying and cutting out the pattern to make sure the plaids matched.  Now that I kind of know what I’m doing, matching the pattern of a fabric is getting to be a pet peeve.

Something I’m pretty proud of: I used french seams, even on the armscye (photo in slide show)!  I probably didn’t use proper technique or whatever, but I’m really happy with the results.  The armscye is absolutely my biggest sewing challenge, so the fact that I even attempted french seaming, I think, deserves some note.

I’m almost done with my next project, though I ran into some snags that might take some time and ingenuity to address.  I hope it won’t take me another 4 months to post again!